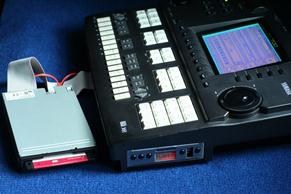
Copying data from floppy disks without a PC

So, copy the information onto a memory card using a musical instrument without the aid of a computer. What is it for? First, not every computer can read a floppy disk, and even copy data. Many instruments save data in the formats which are not compatible with standard PCs. Secondly, not every PC has an FDD. And, finally, a PC may not be at hand at the right time.
Moreover, once all your valuable information resulting from many years of your hard creative work has been moved to a safe, reliable, almost everlasting memory card of our device, it can be saved straightforward to your computer, using our 2AVCom Host software, supplied. See more detailed information in the section describing the software provided.
The diskette-to-memory card copying procedure is as follows.
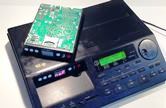
1. Place the device inside your musical instrument and test its functionality. To test, you need to perform any bank standard operations on the disk: formatting, copying, saving data to a bank, bank changing, making sure that accidental erasure protection is available.
2. Turn off the instrument.
3. Connect your musical instrument’s FDD to a flat cable and connect the power cord.
4. Check the installation.
5. Set the INT mode on your instrument. While doing this, do not change any other settings.
6. Switch OFF and ON your musical instrument.
7. Prior to copying the information, banks need to formatted using your musical instrument. It is a standard procedure like that used for floppy disks. Do not forget to disable the erasure protection feature, if it is on.
8. Select the floppy disk you want to copy and insert it into the drive.
9. Invoke your musical instrument’s copy function.
10. When you are prompted to insert a diskette to be copied (source disk), select a vacant bank and copy the information there.
11. Check if the copying operation has been successful validity, and check the readability of the bank.
12. Perform the above operations on all other disks to be copied.
13. Having completed copying, turn off the power and detach the original FDD.
14. Carefully, pack in the additional flat cable and power wire inside the instrument.
15. Reassemble your musical instrument.
16. Set the mode to EXT Uniflash USB v2 device.
17. Enable the accidental erasure protection feature,
18. Pack the original FDD and keep it together with the diskettes.
← Back to Section


